If you have recently switched to windows 7 from windows xp,then the problem of compatibility must be coming,although in windows 7 a compatibility wizard is there to help you but for some application,it also fails.
especially programs of dos (16bit) like c++,basic,logo may not be running (specially in win7 64bit),a notification saying “select the correct architecture of the program 64bit or 32 bit“.Many solutions are here on net to overcome this problem ,specially third party software like dosbox are promoted to be used. This doesnt mean win7 does not support apps as win xp does,but the compatibility of win7 is 10times greater than xp.Win7 (64 bit can run any app no matter it is 16bit ,32bit or 64 bit),thats why we prefer 64bit processorof win7.
To troubleshoot the problem microsoft has introduced its virtualisation software
making-win7-genuine-rearming-win7
“Windows Virtual PC”
Windows Virtual PC:-
VPC is a virtualisation software distrubuted by windows to work with win7.It creates a virtual environment for application ,so that they can run with win7,although the installation is quite lengthy as compared to thrd party softwares like dosbox and sunbox ,but we recommend to use VPC as it is offered by microsoft and is also digitally signed by the company.This software will allow you not only to run apps but also the whole operating system in your win7.the os will run like a ordinary app in your 7.
you can install xp or vista to work with your 7 ,here we are writing steps to install virtual winxp(xpm) also known as xpm or xp mode for win7.By following the same procedure you can also install vista.
Here are some of new features in Windows Virtual PC that make it easier for you to run your legacy applications in a virtual software environment:
Another important note: XPM is a concept. Not a virtual machine. However, Microsoft has made a default Windows XP VM available to download, and has integrated it into Windows Virtual PC. Thus, when referring to XPM, in fact I am talking about what is called "Virtual Windows XP".
Here's How: (WINDOWS VIRTUAL PC AND XPM)
especially programs of dos (16bit) like c++,basic,logo may not be running (specially in win7 64bit),a notification saying “select the correct architecture of the program 64bit or 32 bit“.Many solutions are here on net to overcome this problem ,specially third party software like dosbox are promoted to be used. This doesnt mean win7 does not support apps as win xp does,but the compatibility of win7 is 10times greater than xp.Win7 (64 bit can run any app no matter it is 16bit ,32bit or 64 bit),thats why we prefer 64bit processorof win7.
To troubleshoot the problem microsoft has introduced its virtualisation software
making-win7-genuine-rearming-win7
“Windows Virtual PC”
Windows Virtual PC:-
VPC is a virtualisation software distrubuted by windows to work with win7.It creates a virtual environment for application ,so that they can run with win7,although the installation is quite lengthy as compared to thrd party softwares like dosbox and sunbox ,but we recommend to use VPC as it is offered by microsoft and is also digitally signed by the company.This software will allow you not only to run apps but also the whole operating system in your win7.the os will run like a ordinary app in your 7.
you can install xp or vista to work with your 7 ,here we are writing steps to install virtual winxp(xpm) also known as xpm or xp mode for win7.By following the same procedure you can also install vista.
Windows XP Mode
Windows XP Mode (or XPM for short) is a new feature of Windows 7 (available only in the Professional, Enterprise and Ultimate editions) that can help businesses to upgrade their computers to Windows 7. It does so by providing a virtual Windows XP environment capable of running many Windows XP-compatible business and productivity applications. By using Windows Virtual PC you can now run many older business and productivity applications that only work in Windows XP on your Windows 7 machine. This is made possible by installing these applications inside the Windows XP virtual machine, and integrating them with your Windows 7 desktop and start menu. This way, you can launch these applications from the Windows 7 desktop or Start menu with just a single click, and have them integrate seamlessly with the Windows 7 environment.Here are some of new features in Windows Virtual PC that make it easier for you to run your legacy applications in a virtual software environment:
- The ability to use many of your USB devices from within a virtual Windows environment, such as Windows XP Mode.
- Seamless launching of Windows XP applications from your Windows 7 desktop, Start Menu, or Taskbar.
- Clipboard sharing, which enables you to cut, copy, and paste data between the host Windows 7 desktop and the virtual machine.
- Printer sharing between the Windows 7 desktop and the virtual Windows environment.
- Drive sharing, which provides easy access to all host data from within the virtual machine.
- Folder integration between operating environments
How to Install Windows XPM
Important: To run Windows Virtual PC (and with it, XPM), your computer has to have the Intel VT or AMD-V features enabled in the BIOS. To find out if your PC is virtualization capable, please visit the Windows Virtual PC support page.Another important note: XPM is a concept. Not a virtual machine. However, Microsoft has made a default Windows XP VM available to download, and has integrated it into Windows Virtual PC. Thus, when referring to XPM, in fact I am talking about what is called "Virtual Windows XP".
Here's How: (WINDOWS VIRTUAL PC AND XPM)
1. Go to the Windows Virtual PC website, select your 32-bit or 64-bit Windows 7 version and language. (see screenshot below)
2. Afterwards, click on the Windows XP Mode download button in step 3 at that site. (see screenshot below)
3. Click on Continue for Windows validation. When validation is complete, click on Continue to start the download process. (see screenshots below)
NOTE: You will need to have cookies enabled to be able to do this.
also make sure that you donot close the validation code generator window until you validation is confirm,
4. Download and Install Windows XP Mode
A) Click on Save, then save the WindowsXPMode_en-us.exe file to your desktop. (see screenshot below)
B) Double click on the downloaded WindowsXPMode_en-us.exe installation file to start installing it.5. Download and Install Windows Virtual PC
NOTE: The part of the name in red will vary for you depending on what language you selected (step 1).
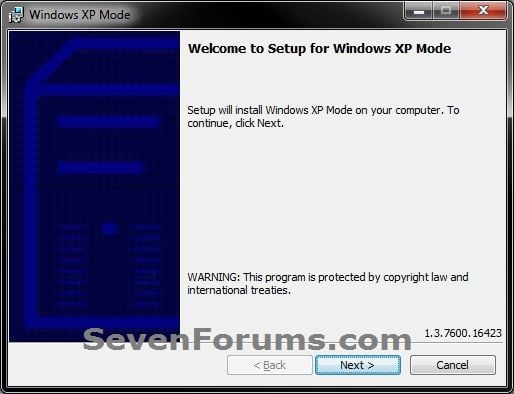
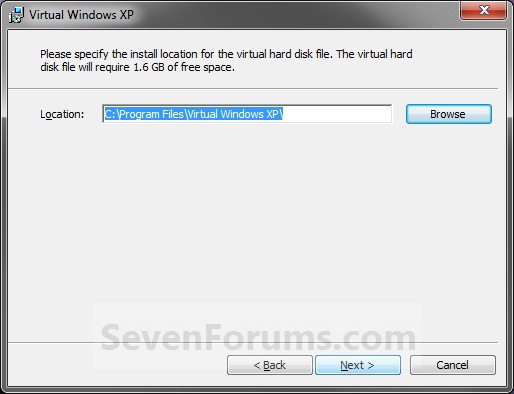
C) Click on the Next button. (see screenshot below)
D) Click on the Next button. (see screenshot below)
E) If prompted by UAC, click on Yes.
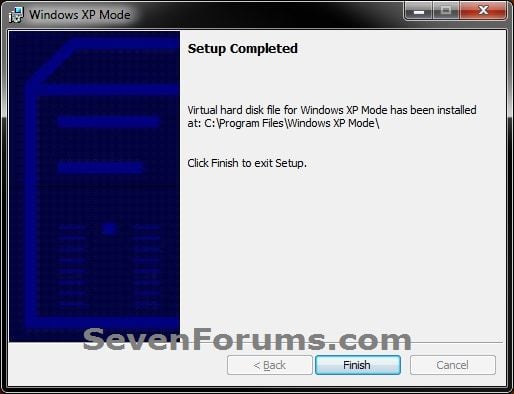
F) When Windows XP Mode is finished installing, click on the Finish button. (See screenshot below)
A) At the Windows Virtual PC website, click on the Windows Virtual PC download button in step 3 at that site. (see screenshot below)
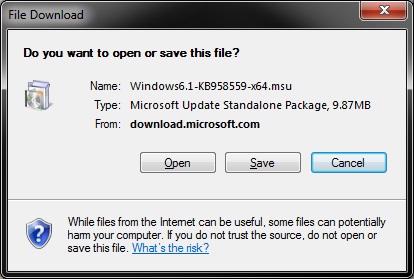
B) Click on Save, then save the Windows6.1-KB958559-x86-RefreshPkg.msu orWindows6.1-KB958559-x64-RefreshPkg.msu file to your desktop. (see screenshot below)
C) Double click on the downloaded Windows6.1-KB958559-x86-RefreshPkg.msu orWindows6.1-KB958559-x64-RefreshPkg.msu file to start installing it.
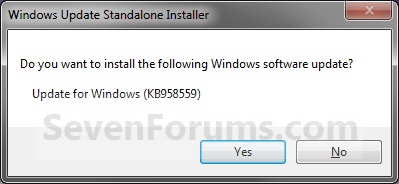
D) If prompted by UAC, click on Yes.E) Click on Yes. (see screenshot below)
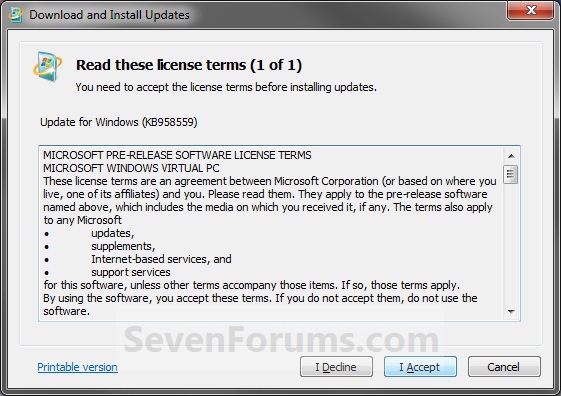
Forgot password Win7 xp vista:click hereF) Click on the I Accept button. (see screenshot below)
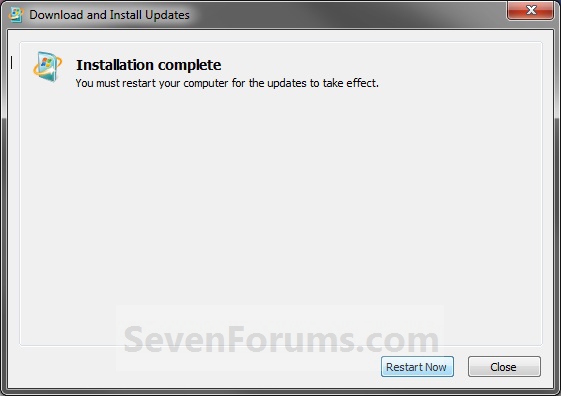
G) When it is finished, click on the Restart Now button. (see screenshot below)
WARNING: This will restart your computer immediately. Be sure to save and close anything that you have open first.
H) When the computer is finished restarting, continue on to step 6 below.
6. Download and Install Windows XP Mode Update
NOTE: Enables Windows XP Mode for PCs without Hardware Assisted Virtualization Technology. For more information, visit the Frequently Asked Questions page. While the Windows XP Mode Update download may be optional for PCs with Hardware Assisted Virtualization Technology, it will not hurt anything to install it to be safe if you are not sure if you do or not.
Note
You will not need to download and install the Windows XP Mode Update if you have theWindows 7 SP1 installed since the SP1 already contains it. You can open winver to see if you are running Windows 7 SP1 or not.
A) At the Windows Virtual PC website, click on the Windows XP Mode Updatedownload button in step 3 at that site. (see screenshot below)
B) Click on Save, then save the Windows6.1-KB8977206-x86.msu orWindows6.1-KB8977206-x64.msu file to your desktop. (see screenshot below)
C) Double click on the downloaded Windows6.1-KB8977206-x86.msu orWindows6.1-KB8977206-x64.msu file to start installing it.D) If prompted by UAC, click on Yes.E) Click on Yes. (see screenshot below)
F) When it is finished, click on the Restart Now button. (see screenshot below)
WARNING: This will restart your computer immediately. Be sure to save and close anything that you have open first.
G) When the computer is finished restarting, continue on to step 7 below.7. To Open and Run Windows XP Mode
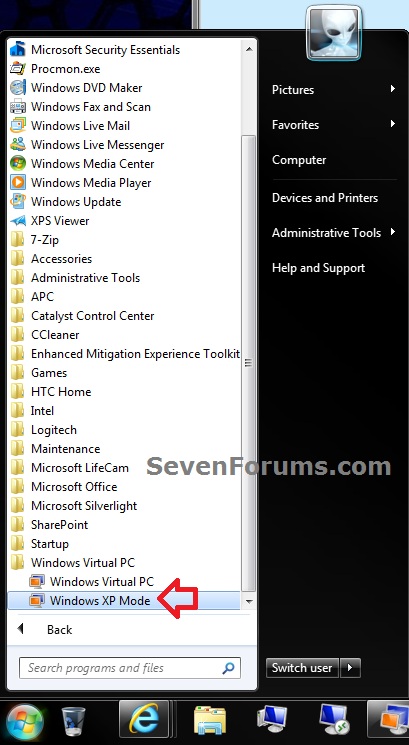
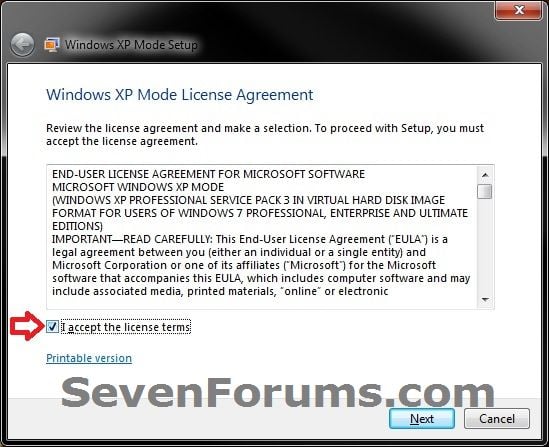
A) Open the Start Menu, then click on All Programs, expand the Windows Virtual PCfolder, and double click on the Windows XP Mode shortcut. (see screenshot below)8. Check the I accept box, then click on the Next button. (see screenshot below)
9. Type in a password and type it in again to confirm it, then click on the Next button. (see screenshot below)
NOTE: If you would like to be logged on automatically whenever you open Windows XP Mode (step 7), then check the Remember credentials box.
10. Select (dot) the Help protect my computer by turning on Automatic Updates now box, then click on the Next button. (see screenshot below)
11. Click on the Start Setup button. (see screenshot below)
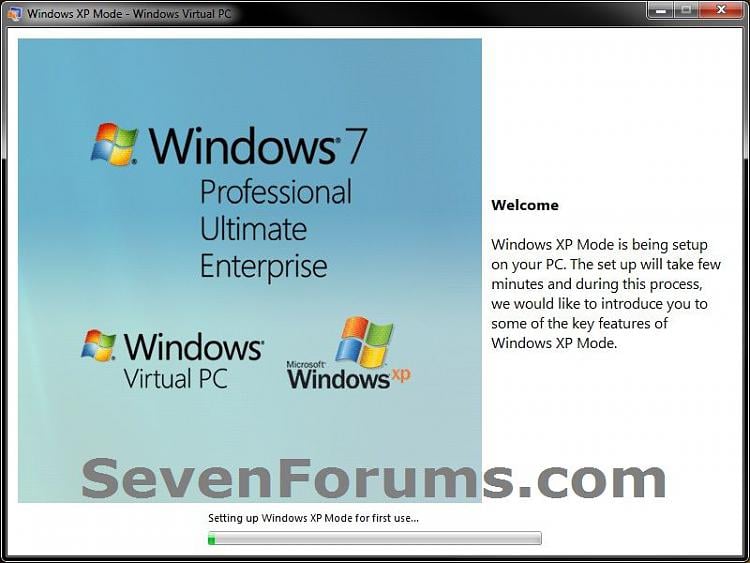
12. You will now see this for a few moments while Windows XP Mode is being setup. (see screeshot below)
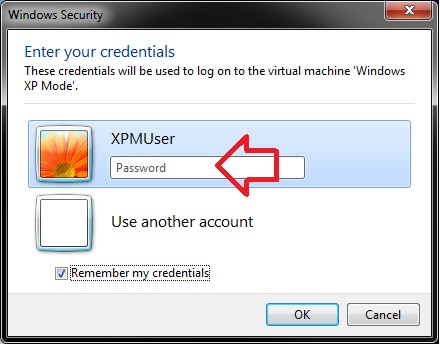
13. When setup is finished and you did not check the Remember credentials box in step 9 above, then you will need to enter your password entered and click on OK. If you did, then skip this and continue on to step 14. (see screenshot below)
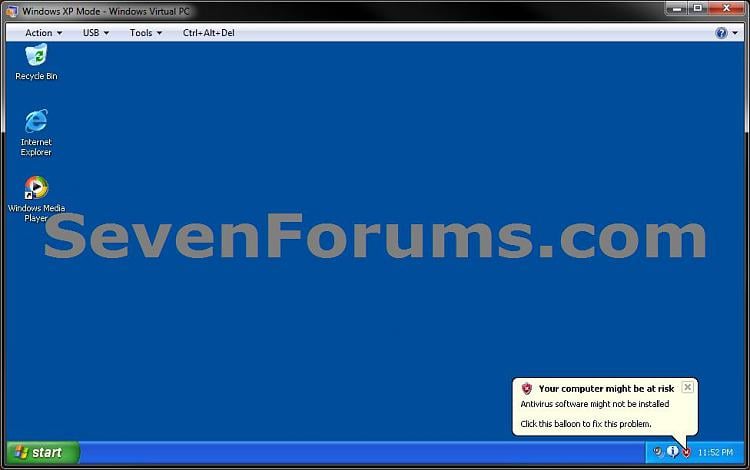
14. The Windows XP Mode - Windows Virtual PC window will now open. You are now in Windows XP Mode. (see screenshot below)
15. Next, be sure to install Integration Components and enable Integration Features.
NOTE: Sometimes this will be enabled for you automatically during installation.this can be done by going to the menubar of virtual pc>tools>enable/disable integration features
or In the Windows XP Mode window, click on Tools (menu bar) and Settings>integration features and select the appropritate settings according to your choice.
B) In the left pane
16. Set Windows XP Mode Settings
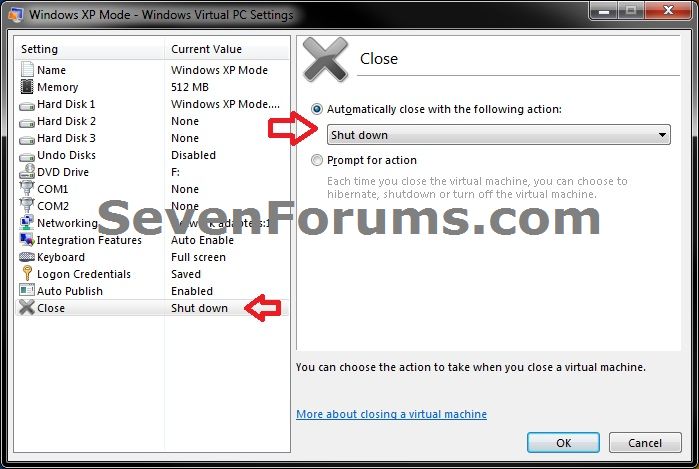
A) In the Windows XP Mode window, click on Tools (menu bar) and Settings. (see screenshot above)17. To Close Windows XP Mode
B) In the left pane, select Close/Shut Down. (see screenshot below)
C) In the right pane, select (dot) Automatically close with the following action, then select Shut Down and click on OK. (see screenshot above)
A) Click on the X in the upper right corner of the Windows XP Mode window like you would any other window in Windows 7. (see screenshot below step 19)
OR
B) In the Windows XP Mode window, click on Action (menu bar) and Close. (see screenshot below step 19)
19. Installing a Program in Windows XP Mode
NOTE: You would install a program in Virtual Windows XP just like you would in Windows 7 with the same access to everything in Windows 7. For example, hard drives, DVD drives, USB drives, Windows 7 folders and files, etc.....
A) After you have installed any program (ex: CCleaner) in Windows XP Mode, you will notice that there will now also be a shortcut to it in the Windows 7 Start Menu in theWindows XP Mode Applications folder under Windows Virtual PC and Windows XP Mode. (see screenshot below)
NOTE: Double clicking on the program's shortcut (ex: CCleaner) in the Windows 7 Start Menu when Windows XP Mode is closed will open and run the program in Windows 7 but as if it you were running it in Windows XP Mode. You could also move or copy this Windows XP Mode Applications shortcut where you like in Windows 7 for easy use.









Systricks: Win Xp In Win 7:Xp Mode:Virtual Pc >>>>> Download Now
ReplyDelete>>>>> Download Full
Systricks: Win Xp In Win 7:Xp Mode:Virtual Pc >>>>> Download LINK
>>>>> Download Now
Systricks: Win Xp In Win 7:Xp Mode:Virtual Pc >>>>> Download Full
>>>>> Download LINK ht